Introducing Leapters Logic Studio
On this page we want to set you up in the fastest possible way so you can go ahead, create your own Leapter Blueprints and utilize them as soon as possible.
Off you go … Quickstart guide for creating a Blueprint
This video will introduce you to the main parts of our tool and shows the users journey while creating a Blueprint based on natural language requirements:That was too quick? Take your time and check every step in detail below
In a nutshell the fastest way to create and utilize a Blueprint looks like this: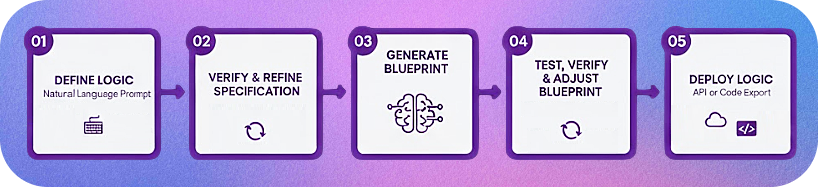
1. Provide your intent via the Prompt
On the Homescreen of the application you can describe the logic you want to be implemented as Blueprint via the natural language prompt. As always with the AI the more precise your prompt is getting the better results you can expect.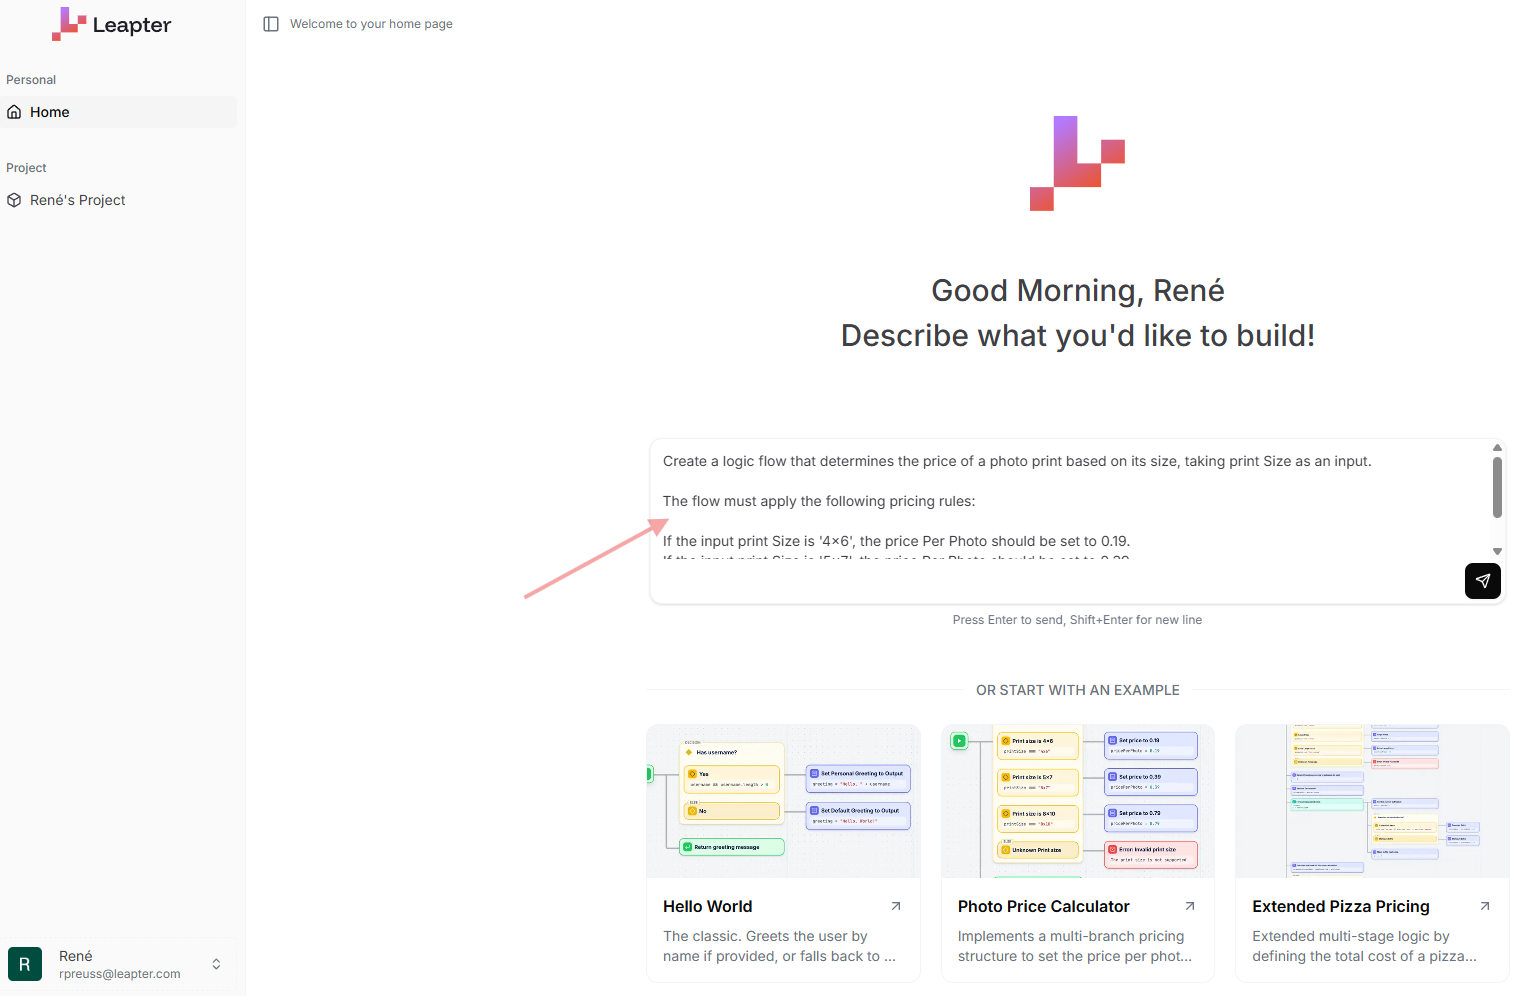
2. Check (and adjust) requirements specification
Now it is the first time for the AI to step in. It will create a structured specification which will serve as the actual input for the Blueprint specification in the next step. Use the chat functionality to adjust or enhance the specification if required.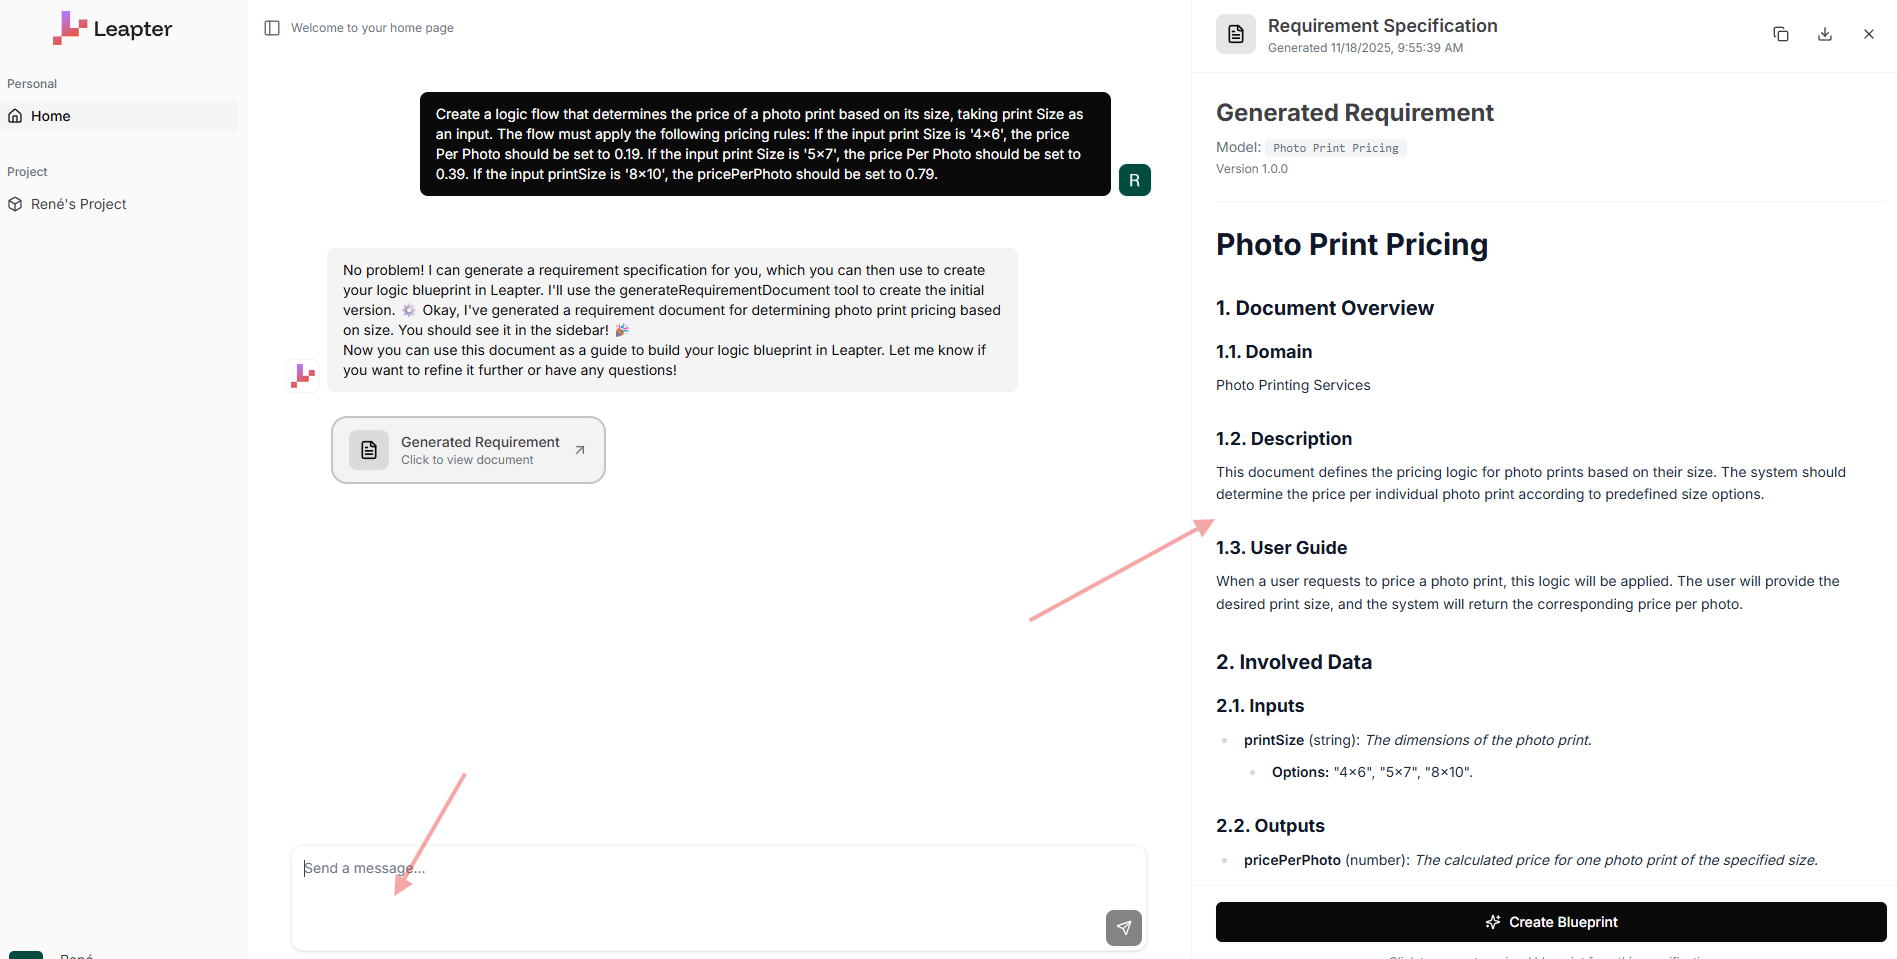
3. Generate Blueprint
Once you are happy with the spec you can go ahead and kick off the actual Blueprint creation by the AI.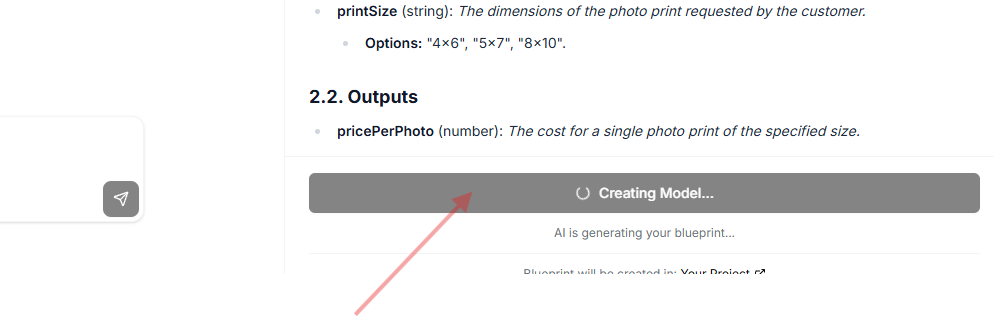
4. Run, refine and adjust your Blueprint
And there you go … your Leapter Blueprint. On this screen you can see your logic implemented as executable “program” using the input factors and logic provided and returning the defined output. Now you have multiple options the run / validate and adjust your Blueprint. For detailed information on this please refer to the Fundamentals section of the Docs page.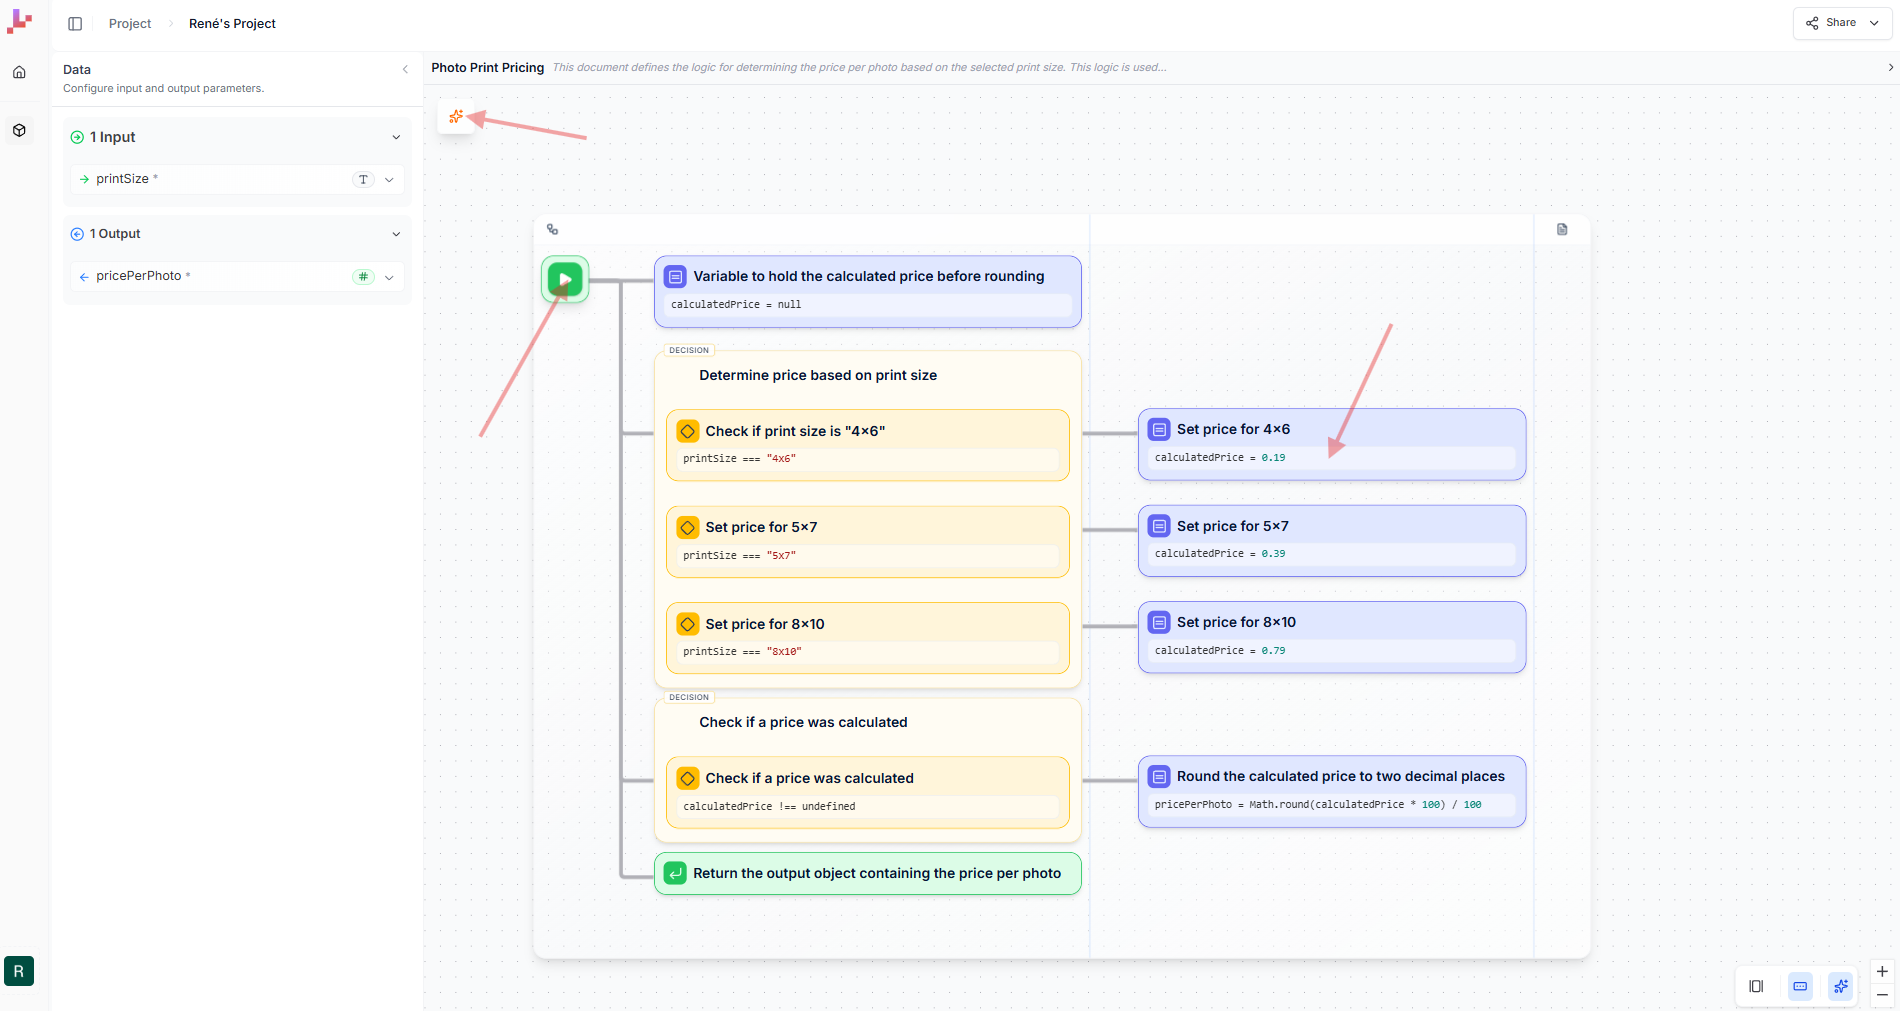
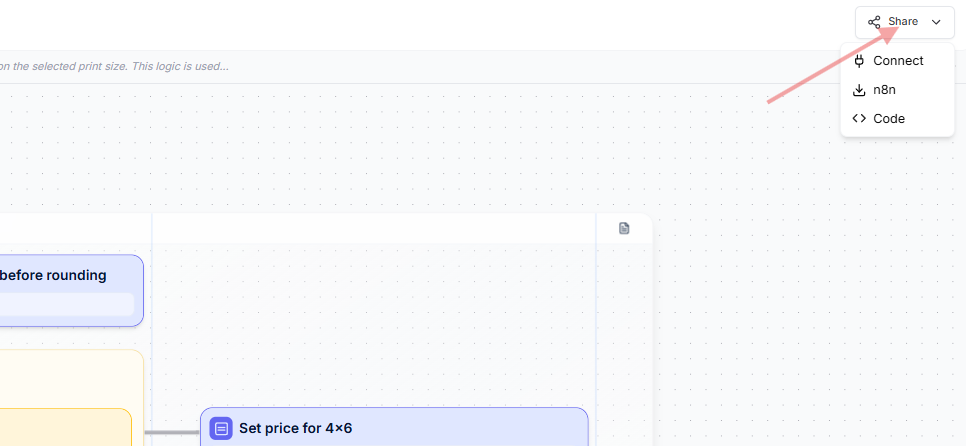
5. Share your Blueprint or export Code
Once you are happy with the results of your logic it’s time to make use of it. Therefor Leapter offers multiple ways to share or export your logic. More information on that topic can also be found in the Use Cases section of this Docs page.