Ctrl+I is the quick, scoped way to edit. For a conversation that can build across multiple
Blueprints, run your tests, and iterate, use the Lab Agent
in the right sidebar instead.
Opening the AI prompt
There are two ways to start an AI edit:- Press Ctrl+I (or Cmd+I on Mac)
- Click the sparkles icon in the right-edge toolbar of a maximized Blueprint
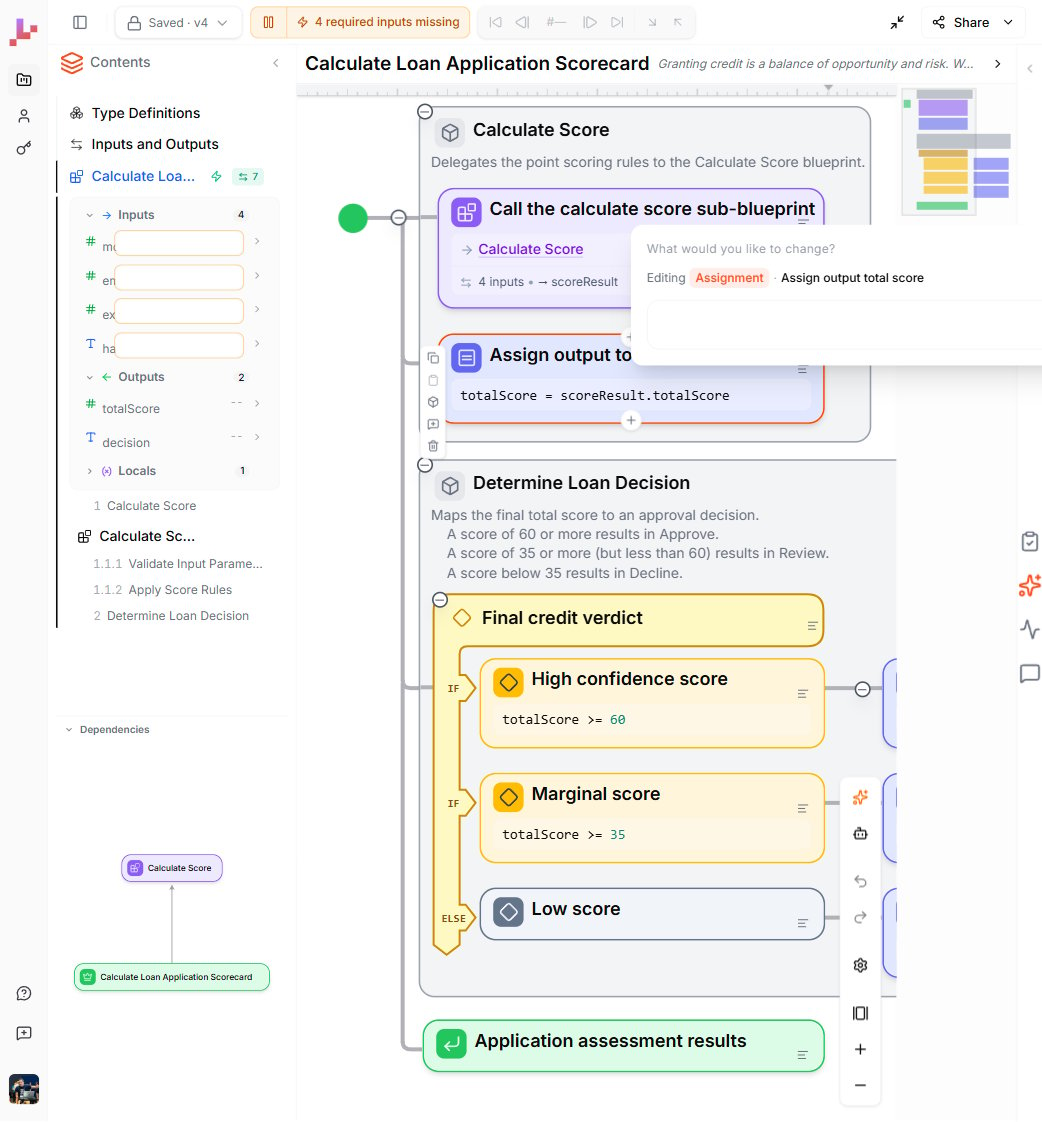
The prompt bar shows what you’re editing:
- “Editing Assignment · Assign output total score” — scoped to a single element
- “Editing Section · Determine Loan Decision” — scoped to a section
- “Editing Blueprint · Calculate Loan Application Scorecard” — scoped to the entire Blueprint
Context-sensitive scope
The AI adapts its scope based on your selection:
This scoping means you can make precise, targeted changes without affecting the rest of your logic — or make sweeping structural changes when needed.
Reviewing AI changes
After you submit a prompt, AI proposes changes and enters Review mode. You don’t have to accept changes blindly — you get to review them first. In Review mode:- Added elements are highlighted in green
- Removed elements are highlighted in red
- Modified elements show the changes visually
- A summary bar shows the total changes: for example, “3 changes: 1 added, 2 modified”
- Apply All — accepts all proposed changes
- Reject All — discards all changes and returns to the previous state
What AI editing can do
Small changes
Adjust a single expression, rename an element, or update a condition:- “Change the Approve threshold from 60 to 65 points”
- “Rename this section to Final Decision”
- “Update the error message to include the minimum required income”
Structural changes
Add new sections, reorganize logic, or introduce new decision branches:- “Add a section that gives bonus points for applicants with more than 5 years of employment”
- “Split this section into two: one for income scoring and one for debt scoring”
- “Add a new condition that auto-declines applications with existing debt over 50,000”
Tips
- Be specific — “Set the Approve threshold to 65” works better than “make it stricter”
- Start small — try element-level edits before restructuring entire sections
- Use Review mode — always check what AI changed before applying
- Combine with inline editing — use AI for structural changes, then fine-tune expressions and descriptions manually with inline editing
What to do next
- Lab Agent — have a conversation that builds across Blueprints and runs your tests
- Inline Editing — edit elements directly on the canvas
- Logic & Descriptions — keep your descriptions and logic in alignment
- Test your Blueprint — run your Blueprint to verify your changes