

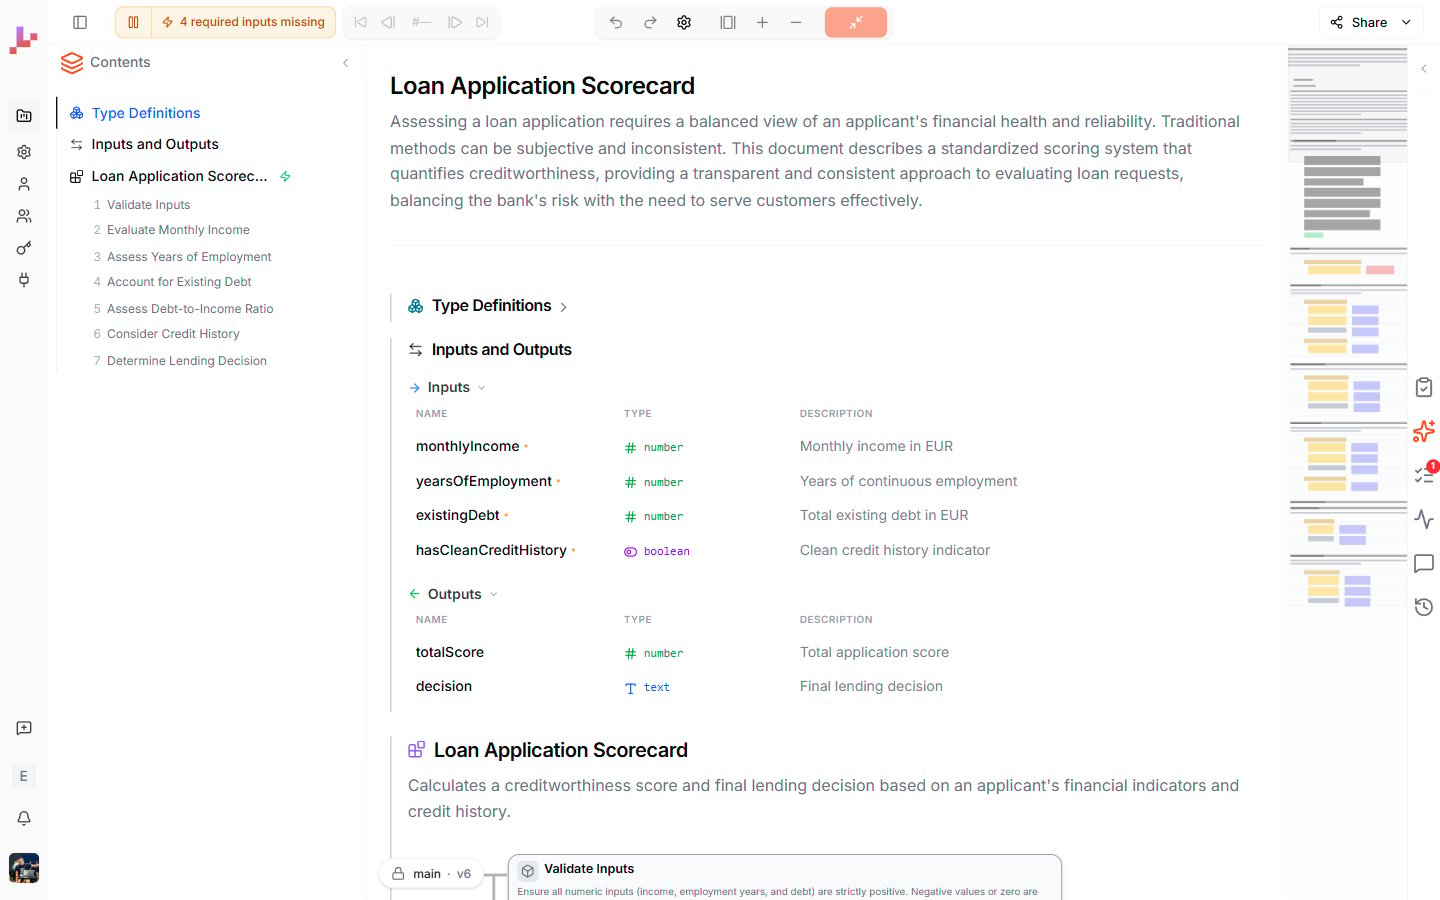
What you see
The document is organized top to bottom:
The Contents sidebar on the left mirrors this structure as a navigable table of contents. Click any entry to scroll to it; double-click to maximize.
Navigating the document
Scroll, click, or jump
- Scroll through the document to read your project end to end.
- Click an entry in the Contents sidebar to jump to that section. The view scrolls smoothly and the entry is highlighted as the active section.
- The minimap docked to the right edge of the document gives you a compact overview of the whole project — click anywhere on it to jump to that location.
Maximize a Blueprint
Each Blueprint section has a maximize icon in its header. Click it (or double-click the Blueprint’s entry in the Contents sidebar) to fill the canvas with that Blueprint’s diagram. While maximized:- The Blueprint’s name appears in the top toolbar as a pill.
- The right-edge toolbar gives you AI editing, the Lab Agent, undo / redo, and zoom controls — see Diagram view.
- Click Minimize in the top toolbar to return to the full document.
Editing in the Specification view
The Specification view is fully editable. You can:- Edit titles and descriptions directly in the document — section headings, Blueprint descriptions, and node labels are all click-to-edit.
- Edit nodes inside the embedded diagram — every diagram in the document is interactive. Click a node to select it, double-click to edit. See Inline editing.
- Make a quick AI edit — select a section, a Blueprint, or nothing, then press Ctrl+I (or Cmd+I on Mac) to open the AI prompt for that scope. See AI editing.
- Build or edit with the Lab Agent — open the Agent tab and describe the change in plain language; the agent can build across Blueprints and run your tests. See Lab Agent.
Running Blueprints from the Specification view
Each Blueprint section has its own run controls. After a run, the Outputs footer at the bottom of the section shows the resulting output values, and the trace controls in the top toolbar become active so you can step through the execution. Leave Live mode running in the top toolbar and Leapter re-runs your Blueprints automatically every time you change inputs or logic — the Outputs footer of every Blueprint updates as you edit.When the Specification view is most useful
What to do next
- Diagram view — focus on a single Blueprint’s diagram
- Type Definitions — define reusable Value Types and Data Types
- Logic & Descriptions — keep descriptions and logic in sync with AI
- Sharing — share your project as a public read-only link