Opening the Tests panel
Click the Tests button in the right sidebar of the editor to open the Tests panel.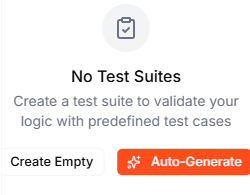
Creating a test suite
You have two options:Auto-Generate with AI
Click Auto-Generate to let the Lab Agent analyze your Blueprint and create a comprehensive test suite automatically. It examines your logic — decision branches, boundary conditions, error paths — and generates test cases that cover each scenario. For example, for the Loan Application Scorecard, the AI might generate tests like:- Strong applicant approved — high income and a clean credit history produce an Approve decision
- Approve boundary — tests the boundary at totalScore = 60
- Review band — tests a borderline score of 35 or more but below 60
- High existing debt penalty — debt over 10,000 subtracts points
- Clean credit bonus — a clean credit history adds points
- Low income, short employment → Decline — exercises the decline path
Create Empty
Click Create Empty to start with a blank test suite, then add test cases manually using the Add Test button. This is useful when you want to test very specific scenarios or edge cases.Running tests
Run all tests
Click Run All to execute every test case in the suite. The results appear immediately: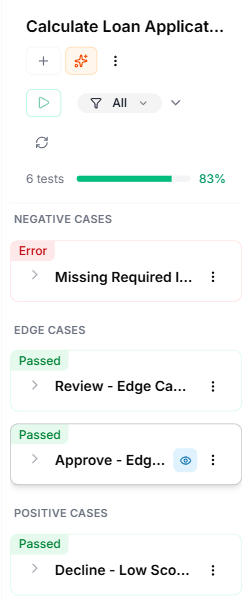
- Total tests — how many test cases are in the suite
- Passed — tests where the actual output matched the expected output
- Failed — tests where the output didn’t match
- Pass rate — the percentage as a progress bar (e.g., 90%)
Run individual tests
Each test case has its own Run button, so you can re-run a single test without running the entire suite.Understanding test results
Each test case shows one of three statuses:Investigating failures
When a test fails, it expands to show the Output Mismatch — a table comparing the expected and actual values for each output field that differs. For example, an “Approve boundary” test might show:
This tells you exactly which output value was wrong and by how much, helping you pinpoint the issue in your logic.
You can also click Run on a failed test to execute it individually, then use the trace controls to step through the execution and understand where the logic diverged from your expectations.
Managing test suites
Adding tests
Click Add Test in the test suite header to add a new test case manually. You define the input values and the expected output values.Adding tests with AI
Click the Auto-Generate (sparkles) button next to “Add Test” to have the Lab Agent suggest additional test cases based on your Blueprint’s logic. This is useful for improving coverage after you’ve already created a suite.Filtering tests
Use the Filter dropdown to show only specific test statuses:- All — shows every test
- Passed — shows only passing tests
- Failed — shows only failing tests
- Not Run — shows tests that haven’t been executed
What to do next
- Test your Blueprint — run individual tests and use Replay to debug
- Inline Editing — fix issues found during testing