

Where to find the Timeline
Open the Timeline tab in the right sidebar of the Blueprint Editor.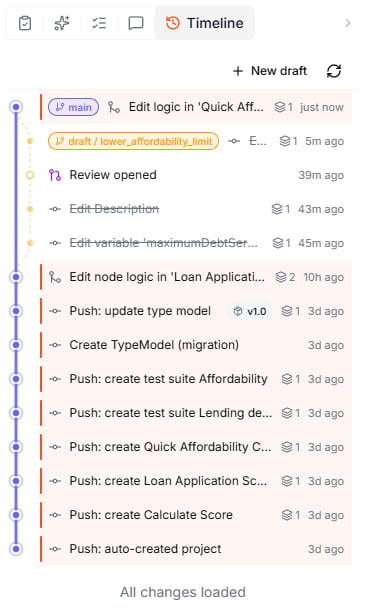
The Timeline lists every change, newest at the top, with the stream it belongs to.
+ New draft at the top starts a draft when the project uses Pending changes + Save.
The list does not show who made each change. To see the author, open the change.
Streams and the change graph
A stream is a line of changes. Every project has a main stream. With the change workflow Pending changes + Save, you also work on drafts: separate streams that start from main and return to it when you save them. The graph makes this visible:- A draft’s lane starts at the version of main it was created from.
- When a draft is saved, a new change appears on main. Its card says which draft was saved and lists the changes it included.
- Saved drafts are struck through: once a draft is saved, its history stays visible but is crossed out.
Open a change to see the detail
Click any change to expand its card.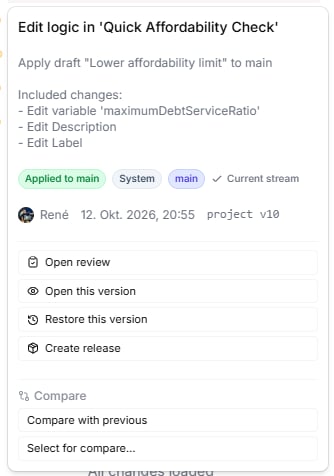
A change card shows what happened, who made the change and when, and its actions.
- What happened: a description and badges for the kind of change (for example Applied to main), its origin (Manual edit, AI, or System), and its stream
- Who and when: the author, the exact timestamp, and the project version the change produced
- Actions: inspect, restore, release, or compare the change
Timestamps in the list are rounded (3h ago). The exact time (down to the minute) is only shown on the card.
Actions on a change
Compare changes
Use the Compare section of a change card to see exactly what a change altered:- Compare with previous: compare this change with the one before it
- Compare with target stream: on a draft, compare it with the stream it will be saved to (usually main)
- Select for compare…: pick this change as one side of a comparison, then choose another change as the other side
Reading a comparison
Once you pick two versions, the editor switches to Compare and shows the difference between them.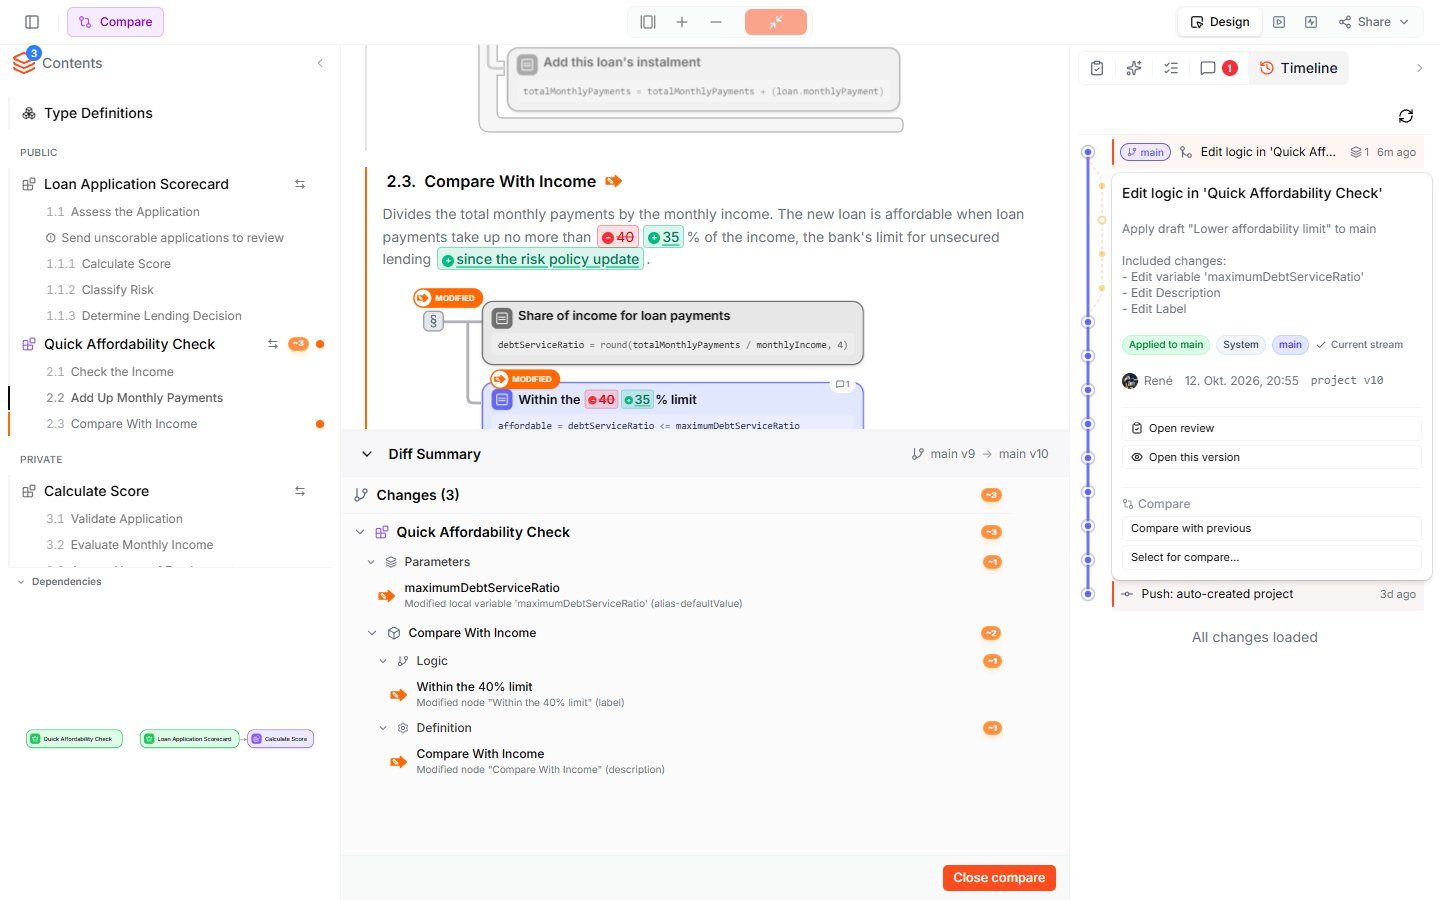
Compare marks each change in place and lists all changes in the Diff Summary.
- The document marks every change in place: removed values are struck through in red, added values are highlighted in green. In the comparison of main v9 and main v10, the affordability limit changes from
40to35. - The Contents sidebar marks the Blueprints and sections that changed.
- The Diff Summary at the bottom names the two versions (for example main v9 → main v10) and lists every change, grouped by Blueprint and element.
Restore an earlier version
If a change introduced a problem, you can roll the project back:- Open the change you want to return to.
- Click Restore this version and confirm.
What to do next
- Change Workflow: choose how edits are saved, and work on drafts
- Review & Approvals: require a review before changes reach main
- Lab Agent: the conversations behind your changes, available from View conversation