

Find your way around
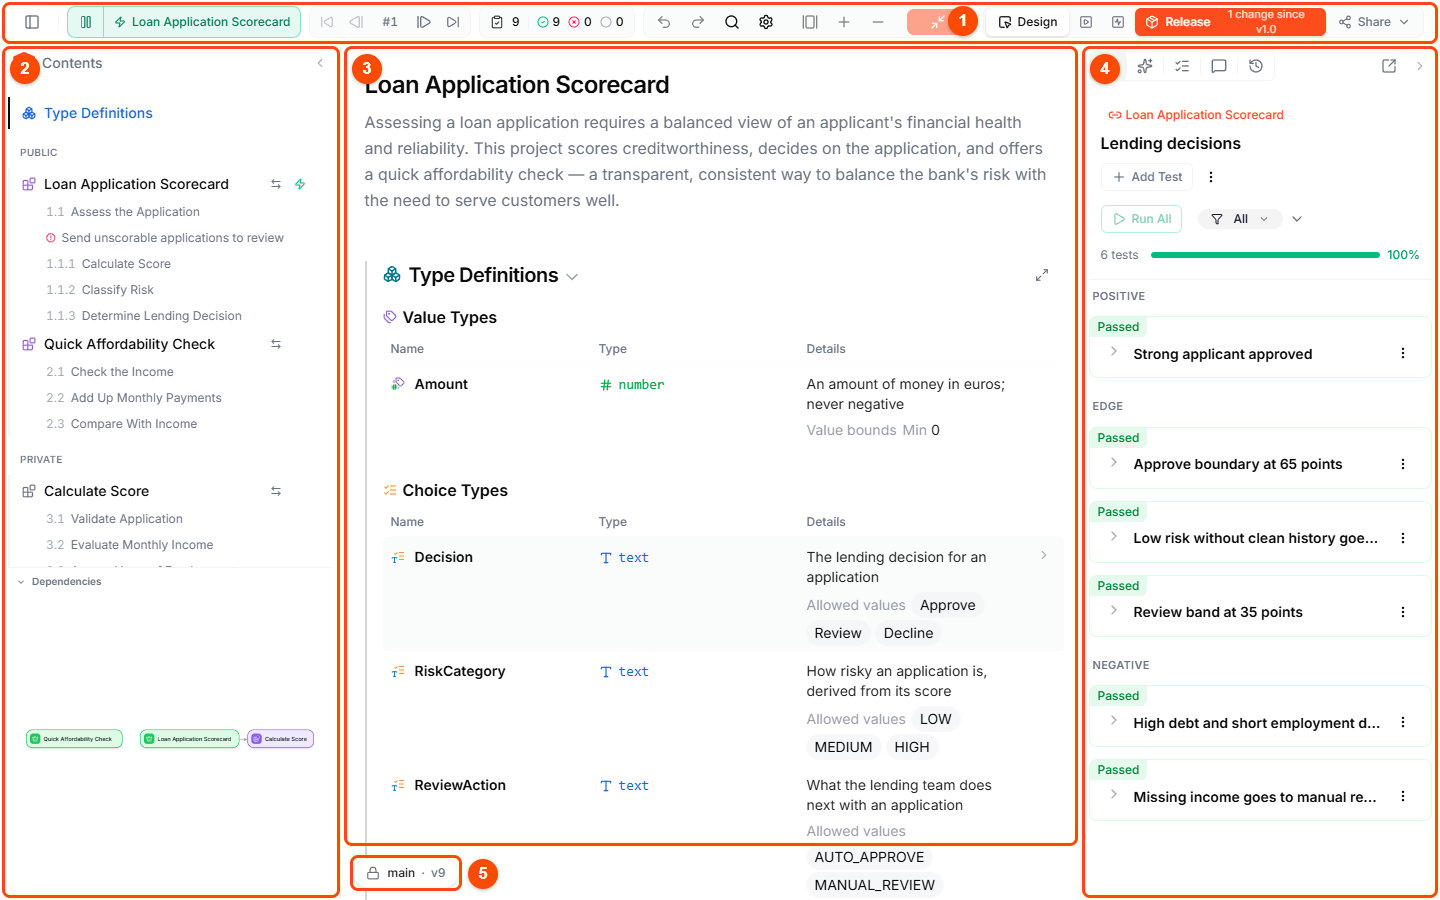
Every button and menu is listed with its name and purpose in Toolbars & Panels.
Three ways to look at a project
The view switcher on the right of the top toolbar changes what the editor shows:Getting around quickly
- Find anything — press ⌘K (Ctrl+K on Windows) to search the whole project. See Search.
- Focus on one Blueprint — double-click it in the Contents sidebar, or click its maximize icon, to fill the canvas with its diagram. Click Minimize in the top toolbar to return to the document.
- Ask the agent about an element — select it and press Ctrl+I (Cmd+I on Mac) to drop it into the Lab Agent chat.
- Run as you edit — leave Live mode running, and the outputs update with every change.
What to do next
- Toolbars & Panels — every button, menu, and shortcut in the editor
- Specification view — navigate and edit the project as a document
- Diagram view — work inside a single Blueprint’s diagram
- Lab Agent — build and edit your Blueprints by chatting with AI