How to create an empty Blueprint
Step 1: Open the Create Blueprint page
When you open an empty project — one with no Blueprints yet — Leapter takes you straight to the Create a Blueprint page. If you don’t have an empty project, create one from the Projects page.Step 2: Start with an empty Blueprint
Click the Start with empty blueprint button at the bottom of the page. Leapter creates a new Blueprint and opens it in the Blueprint Editor, maximized into the Diagram view so you can start building right away.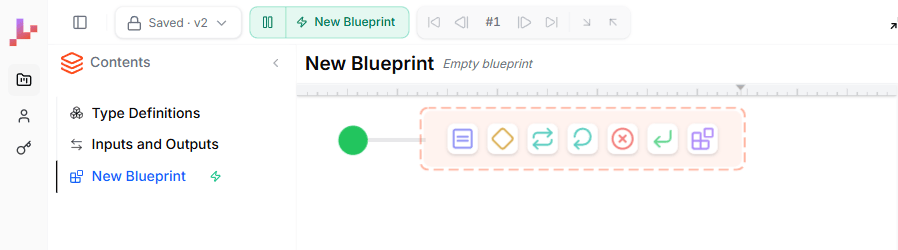
- A Start node (green circle) — the entry point where execution begins
- An element palette — a row of icons next to the Start node for adding your first element
Building your Blueprint
Add elements
Click an icon in the element palette to add an element to the canvas. The palette has seven icons covering these element types:
After you place an element, a new palette appears at its output, letting you chain elements together. You build the flow left to right, top to bottom.
For a detailed guide on each element, see Controlling the Flow.
Define inputs and outputs
Your Blueprint needs data to work with. In the Data panel on the left side:- Click Add next to Inputs to define what information your Blueprint receives
- Click Add next to Outputs to define what results it returns
- Give each parameter a name, type, and description
Configure elements
Double-click any element on the canvas to configure it:- Decision nodes — set the condition expression and define branches
- Assignment nodes — write the calculation or value assignment
- Loop nodes — specify what to iterate over or the loop condition
- Call nodes — select which Blueprint to call and map its inputs
When to start from scratch
Starting from scratch works best when:- You have a clear picture of the logic and want to build it step by step
- You want to learn how Blueprint elements work by placing them yourself
- You need a very specific structure that AI generation might not produce
- You’re building a small helper Blueprint (like a lookup table or simple calculation)
What to do next
- Add your elements — build out the flow by chaining decisions, assignments, and returns
- Test as you go — click the green play button on the Start node to run your Blueprint at any point during development
- Use AI to help — press Ctrl+I (Cmd+I on Mac) to open the AI editing prompt, which can modify selected nodes or add new logic based on your instructions