

Where decision tables appear
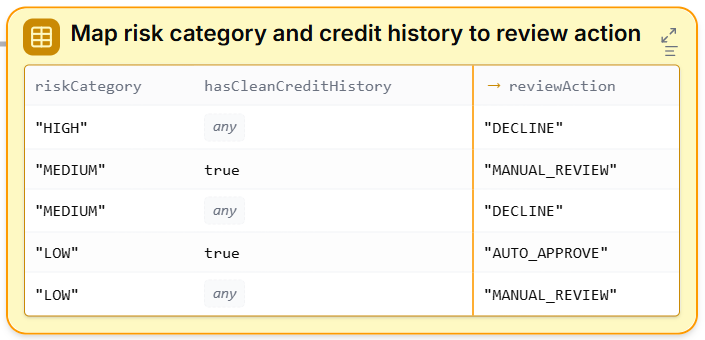
A decision table is a type of element inside a Blueprint, shown as a grid with a table icon. You see it in both places you work with a Blueprint:- In the Diagram view, as a grid element in the flow.
- In the Specification view, as a table in the document.
How to read a decision table
The first-match badge on the table is a reminder that order matters: rules are evaluated top to bottom, and evaluation stops at the first row that matches. A row full of
any at the bottom is a common way to provide a catch-all default.
An input cell matches when the input equals the cell’s value (an enum option or a boolean), or when the cell is any. Output cells are expressions, so an outcome can be a fixed value or a small calculation.
Creating a decision table
The quickest way to add a decision table is to ask the Lab Agent. Describe the rule as a mapping — for example “map each score band and binding flag to a legal consequence” — and the agent builds the table for you. When a rule is a straightforward lookup, the agent now prefers a decision table over a chain of decisions. Decision tables are also part of the underlying Blueprint logic, so they are created and regenerated whenever your logic is generated or edited with AI.Editing cells
To change a decision table by hand, maximize it first: click its maximize icon to open the full-width view, which shows the table’s name, its first-match policy, and the complete grid.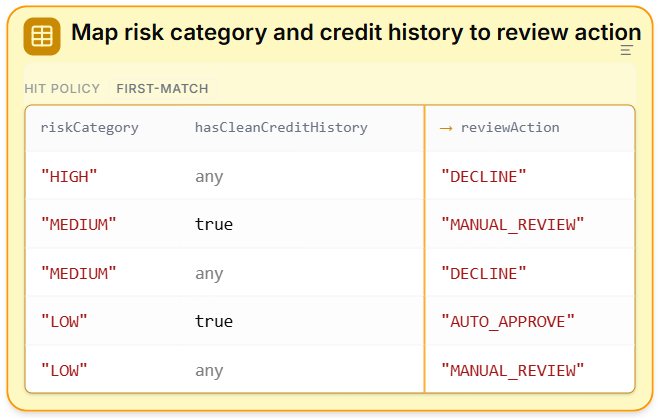
- Edit a value cell — click a cell and type a new value.
- Toggle a wildcard — switch a cell to or from
any.
Editing the compact grid in the flow, and adding or removing whole columns, are not available yet — maximize the table to edit its cells, and use the Lab Agent to change its shape.
Running a decision table
When you run your Blueprint, the row that fired lights up in the table, so you can see exactly which rule applied for a given set of inputs. This makes it easy to confirm that the right rule won — especially useful when several rows could plausibly match and first-match order decides between them.What to do next
- Controlling the Flow — the other elements that make up a Blueprint
- Lab Agent — build and edit decision tables by describing the rules
- Test your Blueprint — run your logic and see which row fires